
Sometimes when building machines with SCCM, they fail. It happens, we accept it, we fix it, we move on. But sometimes, it’s not obvious. Perhaps the 15minute timeout has passed and the machine has booted to the OS without anyone realising, or even days go by before someone goes back to check how it got on.
This can really happen at any point after your “Apply Operating System Image” step and your IT folk doing the deployments would likely be none the wiser if they’re not present, until you get called saying the machine is missing X Y & Z.
So ok, how do we make it obvious? How do we make it so it’s impossible to miss even to the most basic of user that the machine they are looking at has not been deployed correctly, and needs attention..
Well, one could argue steps and folders in the TS to catch errors (Jörgen Nilsson has written a great blog on this), or even monitoring tools;

And they’re great! Providing you’re looking at them at the time. Which lets be honest, most of our deployment guys don’t..
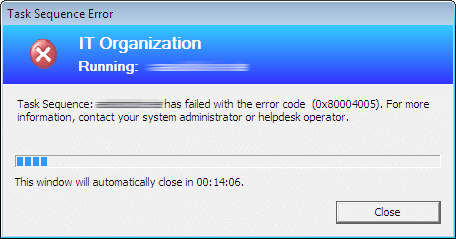
We need a really in your face “Hello! I’ve failed!”…

That’ll do it.
How do it do that!!?.. I hear you..
It all starts in the Wim. Because as mentioned earlier, our build could fail at absolutely any point after its installed the OS, and we want resilience for that and any scenario thereafter. So we are going to hard build in that lockscreen wallpaper into our Wim, then one of our very last steps in the Task Sequence will change it from “Failed” to “Success”, or a normal wallpaper.
That way, if our client fails at any point in the Task Sequence between installing the Wim, and the end of our Task Sequence, it will be absolutely in your face obvious that said machine has not completed successfully… even hours, days, years later!
Firstly download our required files: Download
Now in your base Wim image..
1) Create the folder structure C:\Windows\BG\
2) Copy “background_PreLoginRed_SCCM_Build_FailedWarning.jpg” here.
3) Set the following: “HKLM\Software\Policies\Microsoft\Windows\Personalization\LockScreenImage”, “C:\Windows\BG\background_PreLoginRed_SCCM_Build_FailedWarning.jpg”, “REG_SZ”

There are numerous ways to achieve the above, just ensure you update and re-capture \ import to SCCM etc afterwards.
That’s it for the Failed part.. easy right?
But, we now need to remove it at the end of our Task Sequence. I’m going to go 1 extra here, and change it to a temporary lock screen wallpaper to inform the user that the machine has only recently been built and may still be installing updates and/or applications. This will be automatically removed later.
To do this, I’m going to utilise my OEM Files. I’d advise you read this guide if you haven’t already. Guide – OEM Files
Place the remainder of the downloaded files into your virtual Windows 10 root folder, specifically Windows\BG.

And update your OEM Files package;

So, now these files (assuming you preconfigured this bit as mentioned in my previous guide) will get copied down to our client during the build ready to be used.
So our last step is to create a step in the TS to tell it to remove our red failed image, and replace it with something a little more welcoming.
Put this as late as you can, 1 of your last steps in the TS..
Step: Run Command Line
Name: Set Lock Screen Image
Command line: cmd.exe /c “cscript.exe C:\windows\BG\SetBackground.vbs”

Done.
So what will now happen?
When your Task Sequence runs “SetBackground.vbs”, it’ll do two things;
1) Set the background:

2) Create a scheduled task to remove the above background, 24 hours later.
Around* 24 hours later it will run a scheduled task to run “RemoveBackground.vbs”, which will check for the existence of “C:\_SMSTaskSequence” (one of the biggest give away’s somethings not right), and if it doesn’t exist, then delete the keys we set earlier for the background, in turn setting it back to Windows default, and then self destructing and removing the scheduled task.
*I asterisk around 24 hours because sometimes it does run sooner.
And of course, if our client doesn’t get this far and fails, it’ll have our Failed Wallpaper;
So there we are. An absolutely obvious way of instantly seeing if a machine has failed to build just by looking at it, even by the simplest of user. Pretty sweet right?
Find this guide useful? Let me know and please do share!
Until next time..

Hi there, would you have any details on how you did the little green spreadsheet for fails? That would be awesome!
Thanks!
LikeLike
Yes! It’s a heavily modified version of this; https://deploymentbunny.com/2013/12/29/powershell-is-king-create-a-webpage-containing-ltizti-deployment-issues-with-information-and-links-to-logs/
LikeLike